Your roof is your home’s first line of defense against harsh weather—but when a storm strikes and damage occurs, navigating the roofing insurance claim process can feel confusing and stressful. Whether you’re dealing with hail, wind, or other storm-related damage, knowing what steps to take can make all the difference in getting the coverage you deserve.
In this homeowner’s guide, we’ll walk you through the roofing insurance claim process step-by-step—so you can feel informed, confident, and ready to take action when it matters most.
Why Roofing Insurance Matters
Your homeowner’s insurance policy is designed to protect your home from sudden and unexpected damage—like hail, wind, fallen trees, and other weather-related events. If your roof is damaged, your policy may cover all or part of the cost to repair or replace it.
But here’s the catch: You must follow the proper steps to ensure your claim is approved. That’s where this guide comes in.
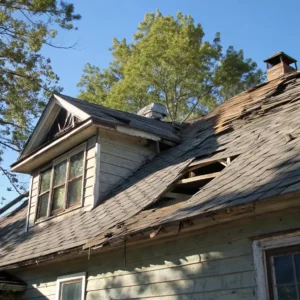
Step 1: Assess the Damage (Safely!)
After a storm or incident, take a walk around your home to visually inspect for signs of roof damage:
Missing or broken shingles
Dented gutters or downspouts
Debris on the roof or around the yard
Water stains on ceilings or attic walls
Tip: Avoid climbing on the roof yourself. Instead, take photos from the ground or call a professional roofing contractor for a safe inspection.
Step 2: Contact a Trusted Roofing Contractor
Before you file a claim, it’s smart to get a professional roof inspection. A reputable contractor can:
Thoroughly inspect your roof
Document the damage with detailed photos
Provide a repair or replacement estimate
Help you determine if filing a claim is the right move
Working with a contractor early on strengthens your claim and ensures no damage is overlooked.
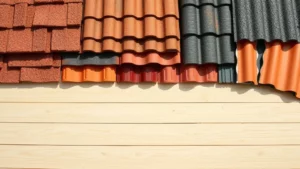
Step 3: Review Your Insurance Policy
Not all roof damage is covered. Take a close look at your policy to understand:
What types of damage are covered (e.g. hail, wind, fire)
Your deductible amount
Whether you have actual cash value (ACV) or replacement cost value (RCV) coverage
Any time limits for filing a claim
Bonus Tip: If you’re unsure about any part of your policy, call your insurance provider and ask for clarification.
Step 4: File the Insurance Claim
Once your damage is verified and you’ve reviewed your policy, it’s time to file a claim. You’ll need to:
Contact your insurance company (most have a claims hotline or app)
Submit photos and documentation
Share the contractor’s report or estimate if available
An insurance adjuster will be assigned to assess the damage in person.
Step 5: Meet with the Insurance Adjuster
When the adjuster visits your property, your contractor can be present to:
Point out all areas of concern
Ensure nothing is missed
Discuss repair or replacement costs
This helps avoid any discrepancies between your contractor’s findings and the adjuster’s report.
Step 6: Claim Approval & Roof Work Begins
Once the claim is approved, your insurer will send payment based on your policy terms. At this point:
Your contractor can begin the repair or replacement process
You may need to pay your deductible out-of-pocket
A final inspection may occur once the work is complete
Be sure to choose a licensed, insured roofing company with experience working on insurance claims—they can handle paperwork, timelines, and ensure compliance with your policy.
Final Thoughts: Stay Informed and Proactive
The roofing insurance claim process doesn’t have to be stressful. With the right knowledge and a trusted roofing partner, you can protect your investment and restore your roof with confidence.
Need help navigating a roofing insurance claim?
At Belman’s Roofing, we specialize in guiding homeowners through the entire process—from inspection to completion. We work directly with insurance adjusters and make sure you get the coverage you deserve.